
Up-potting vegetables—moving them into larger containers as they grow—is important because it gives their roots more space to spread out and stay healthy. When plants get crowded in small pots, their roots can become tangled and stressed, which slows growth and limits how much water and nutrients they can take in. By giving them more room at the right time, you help them grow stronger, develop better root systems, and ultimately produce more vegetables. It also helps prevent problems like drying out too quickly or becoming root-bound, making your plants easier to care for and more productive in the long run
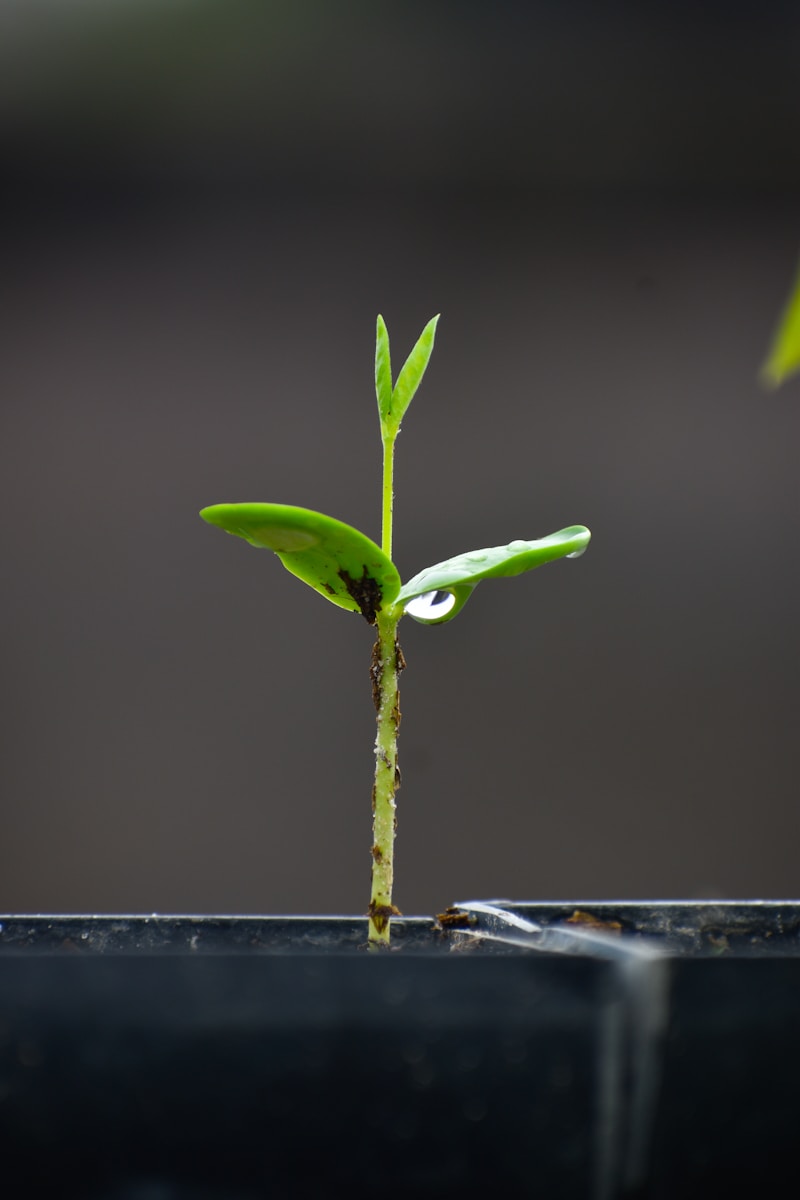
What are true leaves
Anytime we talk about up potted we talk about true leaves, so what exactly is that. True leaves are the first “real” leaves a plant grows after it sprouts. When a seed first pops up, you’ll see a pair of simple, smooth leaves—those are just starter leaves that help the plant get going. The true leaves come next, and they look like the leaves you’d expect from that specific plant, whether that’s jagged tomato leaves or broad squash leaves. Once those show up, it’s a sign your seedling is actually growing up, making its own food, and getting strong enough for things like up-potting or moving outdoors.
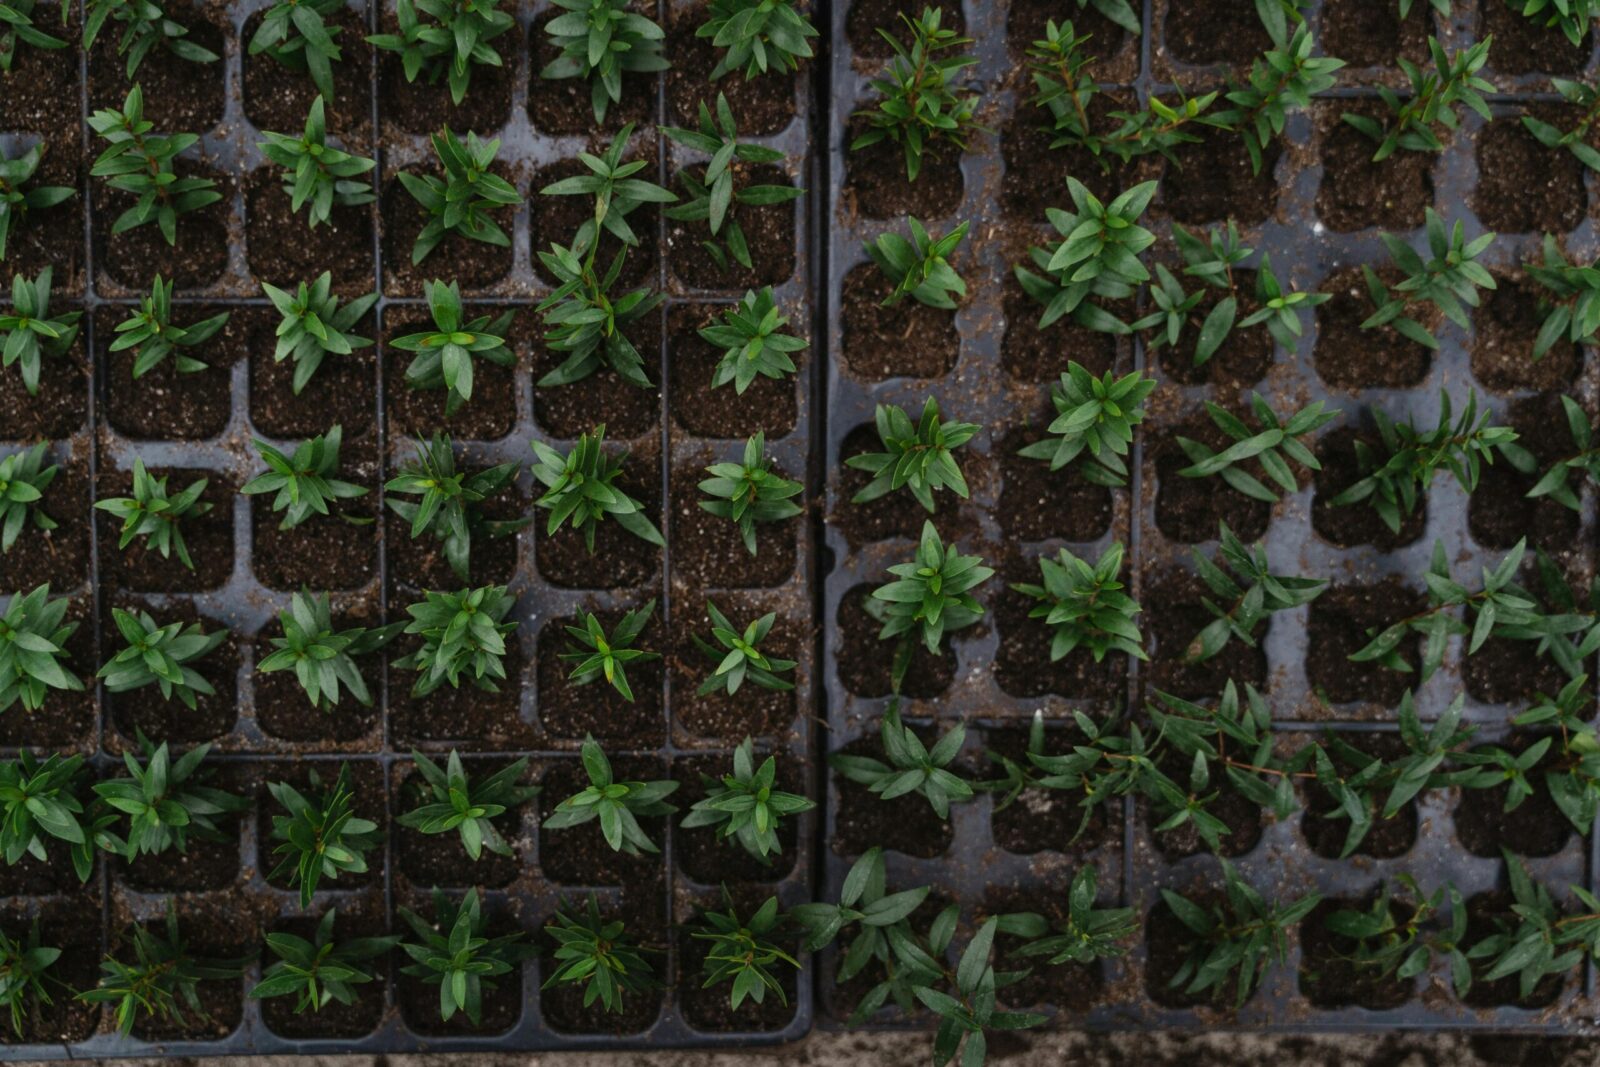
When to up pot common vegetables
| Vegetable | When to Up-Pot | What to Look For |
|---|---|---|
| Tomatoes | 2–3 weeks after sprouting | 2–3 true leaves, stems getting leggy |
| Peppers | 3–4 weeks after sprouting | 2–3 true leaves, slow but steady growth |
| Eggplant | 3–4 weeks after sprouting | 2–3 true leaves, roots starting to fill |
| Broccoli | 2–3 weeks after sprouting | 2–3 true leaves, sturdy small plant |
| Cabbage | 2–3 weeks after sprouting | 2–3 true leaves, not overcrowded yet |
| Cauliflower | 2–3 weeks after sprouting | 2–3 true leaves, compact growth |
| Lettuce | 2 weeks after sprouting | 2 true leaves, delicate but established |
| Cucumbers | 1–2 weeks after sprouting (if needed) | 1–2 true leaves, fast-growing roots |
| Zucchini/Squash | 1–2 weeks after sprouting (if needed) | 1–2 true leaves, outgrowing tray quickly |
| Onions | 4–5 weeks after sprouting | Pencil-thin shoots, crowded cells |
| Herbs (Basil) | 2–3 weeks after sprouting | 2–3 true leaves, starting to bush out |
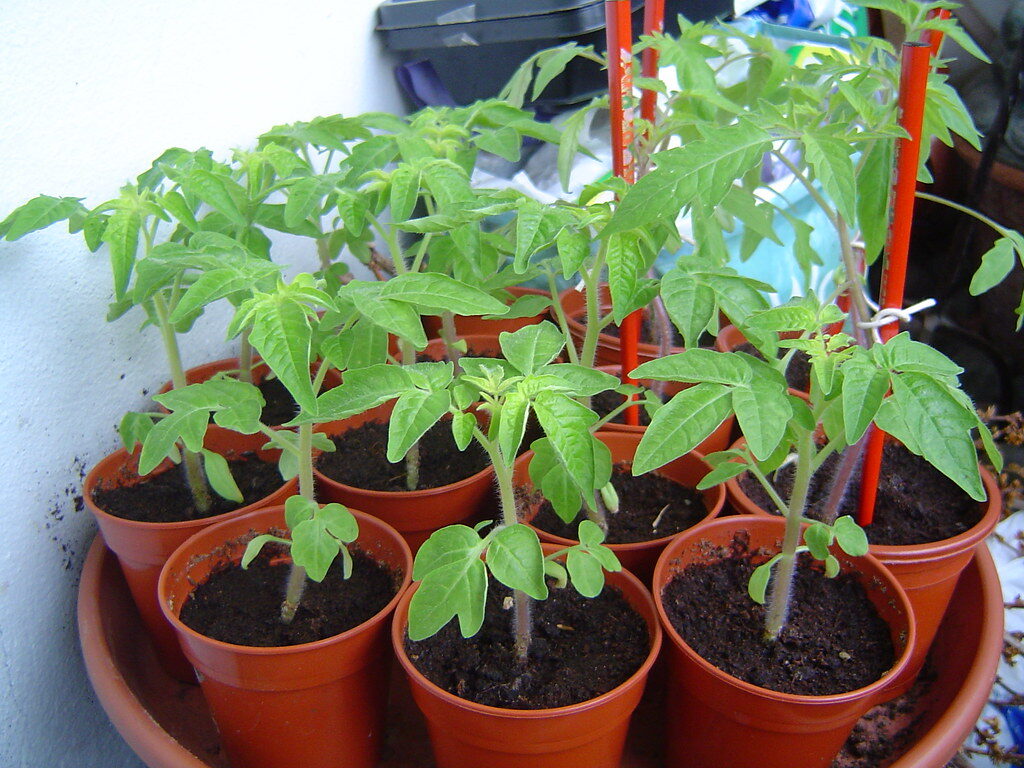
Types of pots to use
When you’re up-potting seedlings, you don’t need anything fancy—just something that gives the roots a bit more room and drains well. A small container around 3–4 inches wide is usually perfect for that next step. Plastic nursery pots are the most common choice because they’re cheap, lightweight, and hold moisture evenly, which helps young plants not dry out too fast. If you tend to overwater, fabric pots or peat pots can be helpful since they drain and breathe more, but they also dry out quicker so you’ll need to keep an eye on them. You can even reuse things like yogurt cups or solo cups as long as you poke drainage holes in the bottom. At the end of the day, the best pot is one that’s the right size for the plant right now and doesn’t let water sit at the bottom.
Recommended nursery pot size
| Vegetable | Recommended Pot Type | Pot Size |
|---|---|---|
| Tomatoes | Plastic nursery pot | 3–4 inch |
| Peppers | Plastic or fabric pot | 3–4 inch |
| Eggplant | Plastic nursery pot | 3–4 inch |
| Broccoli | Plastic or peat pot | 3–4 inch |
| Cabbage | Plastic or peat pot | 3–4 inch |
| Cauliflower | Plastic or peat pot | 3–4 inch |
| Lettuce | Plastic pot or cell pack | 2–3 inch |
| Cucumbers | Peat pot or biodegradable | 3–4 inch |
| Zucchini/Squash | Peat pot or biodegradable | 3–4 inch |
| Onions | Cell packs or shallow tray | 2–3 inch |
| Basil (Herbs) | Plastic or small clay pot | 2–3 inch |

Homemade options
| Vegetable | Homemade Pot Option | Notes |
|---|---|---|
| Tomatoes | Solo cups / yogurt cups | Poke holes in bottom for drainage |
| Peppers | Solo cups / food containers | Sturdy and reusable |
| Eggplant | Yogurt cups | Holds moisture well |
| Broccoli | Toilet paper rolls | Plant whole roll later if desired |
| Cabbage | Toilet paper rolls | Good for short-term use |
| Cauliflower | Paper cups | Biodegradable option |
| Lettuce | Egg cartons | Best for short-term growth |
| Cucumbers | Newspaper pots | Plant directly in ground to avoid shock |
| Zucchini/Squash | Newspaper pots | Roots don’t like disturbance |
| Onions | Shallow takeout containers | Works well for bunching |
| Basil (Herbs) | Small food cans (cleaned) | Make sure to add drainage holes |
The key is simple: whatever you use, make sure it has drainage holes and is big enough for a little root growth. Most seedlings only need a few extra inches of space at this stage, so you can keep it cheap and creative
Ideal Conditions
| Factor | Ideal Condition | Why It Matters |
|---|---|---|
| Light | 12–16 hours bright light daily | Prevents leggy, weak growth |
| Temperature | 65–75°F (18–24°C) | Supports steady, healthy development |
| Water | Keep soil evenly moist, not soggy | Avoids stress and root rot |
| Airflow | Gentle air movement | Strengthens stems, prevents disease |
| Soil | Light, well-draining seed mix | Helps roots grow easily |
| Fertilizer | Half-strength liquid feed (weekly) | Provides nutrients without burning plants |
| Spacing | Not overcrowded | Reduces competition and disease risk |
| Containers | Good drainage | Prevents water buildup and root issues |
Best soil to use
| Factor | Ideal Soil Condition | Why It Matters |
|---|---|---|
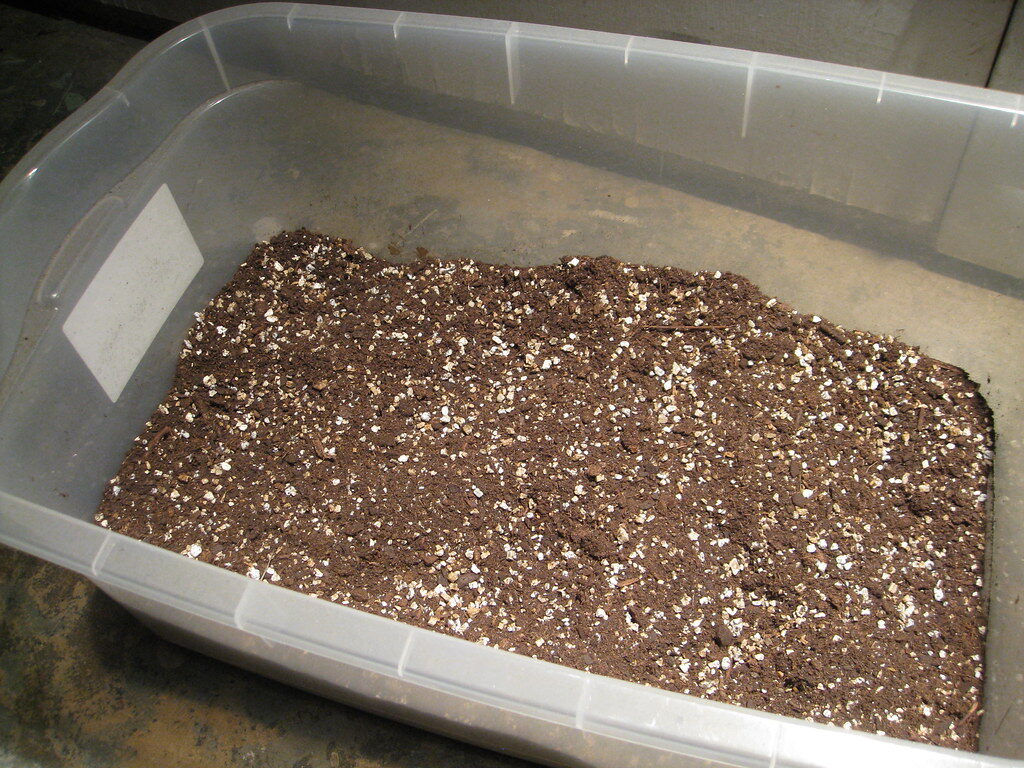
| Texture | Light and fluffy | Lets roots grow easily |
| Drainage | Well-draining | Prevents root rot |
| Moisture Hold | Holds moisture but not soggy | Keeps roots evenly hydrated |
| Ingredients | Peat/coir + perlite + compost | Balanced mix for growth and drainage |
| Nutrients | Low to moderate (starter level) | Avoids burning young roots |
| pH Level | Slightly acidic (6.0–6.8) | Helps nutrient uptake |
| Cleanliness | Sterile or seed-starting mix | Reduces disease and pests |
| Density | Not compacted | Allows airflow to roots |
Best Potting mixes on the market
| Brand/Line | Best For | Key Strength |
|---|---|---|
| FoxFarm Ocean Forest | Heavy feeders (tomatoes, peppers) | Rich in nutrients, very high quality |
| Miracle-Gro Potting Mix | General use / beginners | Easy to use, pre-fertilized |
| PRO-MIX Organic Growing Mix | Seedlings / transplanting | Light, airy, excellent drainage |
| Espoma Organic Potting Mix | Organic vegetable growing | Natural ingredients with beneficial microbes |
| Back to the Roots Potting Mix | Herbs and small plants | Peat-free, good moisture retention |
| Black Gold Organic Potting Mix | All-purpose container gardening | Balanced mix of drainage and nutrients |
Homemade potting mix
Basic Homemade Potting Mix (by volume)
A reliable all-purpose recipe:
- 1 part compost – provides nutrients
- 1 part coconut coir or peat moss – holds moisture
- 1 part perlite or vermiculite – improves drainage and airflow
Optional Add-Ins
- A handful of worm castings (boosts nutrients)
- A small amount of garden lime (if using peat, to balance pH)
- A light sprinkle of organic fertilizer for long-term feeding
Simple Mix Example
- 1 bucket compost
- 1 bucket coco coir/peat
- 1 bucket perlite
Mix thoroughly until it’s light, fluffy, and evenly blended.
What You’re Aiming For
- Moist but not soggy
- Loose and airy (not compacted)
- Drains well but still holds some water
- Free of large clumps or debris
This kind of mix works well for most container vegetables because it gives young roots both the nutrients and the oxygen they need to grow strong. If you want, I can tailor a mix specifically for seedlings vs. fruiting plants like tomatoes and peppers.
When to transplant (Spring)
| Vegetable | When to Plant Outside | Temperature Guide |
|---|---|---|
| Tomatoes | After last frost | Nights consistently above 50°F |
| Peppers | 1–2 weeks after last frost | Warm soil, nights above 55°F |
| Eggplant | 1–2 weeks after last frost | Nights above 55°F |
| Broccoli | 2–4 weeks before last frost | Tolerates light frost |
| Cabbage | 2–4 weeks before last frost | Hardy, handles cold well |
| Cauliflower | 2–4 weeks before last frost | Prefers cool weather |
| Lettuce | 2–4 weeks before last frost | Grows best in cool temps |
| Cucumbers | 1–2 weeks after last frost | Soil above 60°F |
| Zucchini/Squash | 1–2 weeks after last frost | Warm soil and air |
| Onions | 4–6 weeks before last frost | Very cold tolerant |
| Basil (Herbs) | After last frost | Loves warmth, no cold exposure |
Critical temperature
Although it is warm on most days be very caution about leaving plants out at night since it only takes one unexpected frost to kill all your hard work.
| Vegetable | Critical Temperature (°F) | Notes |
|---|---|---|
| Tomatoes | 32°F (frost sensitive) | Damaged by frost; avoid cold nights |
| Peppers | 32–40°F | Very sensitive to cold |
| Eggplant | 35–40°F | Cold stress slows or damages growth |
| Broccoli | 26–28°F | Can tolerate light frost |
| Cabbage | 20–25°F | Cold hardy, tolerates frost |
| Cauliflower | 28–30°F | Sensitive to hard frost |
| Lettuce | 28–32°F | Can handle light frost |
| Cucumbers | 32–40°F | Easily damaged by cold |
| Zucchini/Squash | 32–40°F | Frost will kill plants |
| Onions | 20–25°F | Very cold tolerant |
| Basil (Herbs) | 40–50°F | Cold will damage or kill |
Fertilizing schedule
| Vegetable | When to Start Fertilizing | Feeding Type / Frequency |
|---|---|---|
| Tomatoes | 1–2 weeks after transplant | Balanced liquid fertilizer weekly or biweekly |
| Peppers | 1–2 weeks after transplant | Light, balanced fertilizer every 2 weeks |
| Eggplant | 1–2 weeks after transplant | Balanced fertilizer every 2 weeks |
| Broccoli | 2 weeks after transplant | Nitrogen-rich fertilizer every 2 weeks |
| Cabbage | 2 weeks after transplant | Nitrogen-rich fertilizer every 2 weeks |
| Cauliflower | 2 weeks after transplant | Nitrogen-rich fertilizer every 2 weeks |
| Lettuce | 1–2 weeks after sprouting/transplant | Light fertilizer every 1–2 weeks |
| Cucumbers | 1–2 weeks after transplant | Balanced fertilizer every 2 weeks |
| Zucchini/Squash | 1–2 weeks after transplant | Balanced fertilizer every 2 weeks |
| Onions | 2–3 weeks after sprouting | Light nitrogen fertilizer every 2–3 weeks |
| Basil (Herbs) | 2 weeks after sprouting | Mild, balanced fertilizer every 2 weeks |
General tip:
Use a diluted (about half-strength) liquid fertilizer for young plants to avoid burning tender roots, and always apply to moist soil rather than dry soil.

Up-potting vegetables is a simple step that makes a big difference in how well your plants grow. As seedlings develop, their roots quickly fill up small containers, and without more space they can become cramped, stressed, and less able to take in water and nutrients. Moving them into a larger pot gives the roots room to spread out, which leads to stronger stems, healthier foliage, and overall better growth. It also helps prevent issues like root binding and drying out too fast. In the end, up-potting gives your plants a better foundation early on, which sets them up to be more productive and resilient once they’re moved into the garden.
Comments are closed